Managing a homelab can be overwhelming at first but full of rewards. One easy skill in your virtualization toolkit is knowing how to migrate a Proxmox VM in a cluster. Though its an easy process I’ll walk through a Proxmox Virtual Machine Migration by moving a Ubuntu VM from one node to another.
While my current Proxmox cluster is really only a collection of VMs and LXCs across various nodes in a cluster (with resource pools and CEPH storage upgrades on the horizon), its where I keep my precious things.
While this seems like a really basic action to perform, I was lost the first time I tried and didn’t know where to start, these brief step-by-step instructions will help you see how it works.
Optimizing Resource Management
Although the current Proxmox setup is basic:
- Manual Balancing: I continue using migrations to distribute workload evenly across my nodes.
- Prepare for Upgrades: Although this is a simple process, each piece of functionality you learn refines skills and prepares for implementing advanced features such as resource pools and CEPH storage.
Understanding Your Current Proxmox Environment
What Is Your Current Environment?
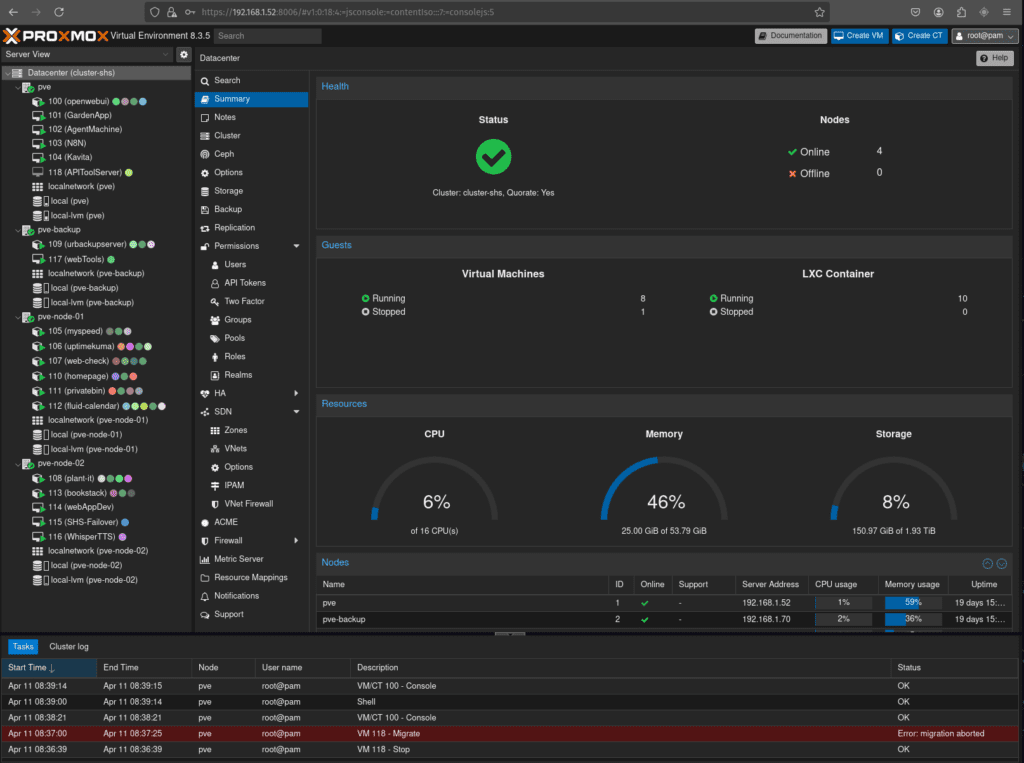
My existing Proxmox setup isn’t a fully integrated cluster—it’s more a collection of VMs and LXCs hosted on different nodes. This kind of setup is typical for homelab beginners. While I do plan to eventually implement resource pools and CEPH storage to enhance resource management, my current structure still provides an excellent opportunity to practice migrating a Proxmox VM and optimizing your setup.
Why Migrate VMs in a Basic Setup?
Even if the cluster isn’t fully finished, migrating a Proxmox VM is a useful skill. Moving a Ubuntu VM from the primary node (the one hosting my ISOs) to another node allows me to balance resources and prepare the environment for future advanced configurations. This process not only improves current performance for an over-allocated node, but also lays the groundwork for integrating well balanced resource controls later.
Pre-Migration Preparation
Planning The Migration
Begin by assessing the current resource allocation of the main node:
- Understand the Limits: Recognize that your nodes are operating independently and that central resource pools are yet to be implemented.
- Prepare for Future Upgrades: Use this migration as a stepping stone toward a more sophisticated environment that will eventually include CEPH storage and dedicated resource pools.
Reviewing The Initial VM Setup
For this example, I have set up a Ubuntu VM on the main node because that’s where my ISOs are stored. Migrating this VM is not only about balancing load—it’s also a step toward organizing the homelab in anticipation of future enhancements.
Verifying Prerequisites
Before you migrate a Proxmox VM:
- Backup Your VM: The likely hood of destruction happening is slim and this is a fresh VM, but its important to protect against potential data loss by creating backups is this is a critical VM.
- Check Node Stability: Ensure both the source and destination nodes are online and communicating.
- Resource Verification: Confirm that the target node has sufficient resources for hosting the VM.
Step-by-Step Guide to Proxmox Virtual Machine Migration
Step 1: Shutting Down the VM
Start by safely shutting down the VM to ensure data integrity:
- Locate the Ubuntu VM on the primary node.
- Use the shutdown option in the Proxmox web interface to power off the VM. Rather than just stopping the VM, a safe shutdown is a precaution that helps prevent any data corruption.
Step 2: Removing the Virtual CD Drive
Before migrating the VM, remove any unnecessary virtual CD devices:
- Enter the VM’s settings.
- Remove the virtual CD/DVD drive to avoid any interference during the migration. A VM with an attached virtual drive cannot be migrated.
Step 3: Initiating the Migration Process
Now it’s time to migrate a Proxmox VM:
- On the source node, right-click on the VM and select “Migrate.”
- A migration popup will appear, allowing you to choose the destination node.
Step 4: Selecting the Destination Node
Within the migration popup:
- Use the dropdown menu to select the node that will host the VM.
- Confirm thr selection to begin the migration process.
Even if your nodes aren’t part of a centralized resource pool yet, this method helps manually balance workloads across the existing setup.

Step 5: Monitoring the Migration
After initiating the migration:
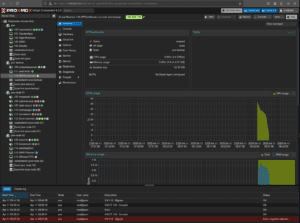
- Monitor the progress with the Proxmox interface.
- The progress log and status updates will update along the way and indicate when the Proxmox Virtual Machine Migration is complete.
- Once finished, the original instance on the source node is automatically removed.

Post-Migration Steps and Validation
Verifying Migration Completion
After the migration process:
- Verify that the status indicates a successful migration.
- Confirm that the Ubuntu VM appears on the destination node.
Starting and Testing the VM
Once verified:
- Power on the VM from the new node.
- Run tests to ensure the VM’s functionality—check network connectivity and performance to confirm that everything operates as expected.
And that’s it! Migration complete and living on its new node.
Conclusion
Merging theory with practice, this guide outlines essentials to migrate a Proxmox VM—a useful skill in homelab management. By following the process, we can ensured:
- Safe shutdown of your VM,
- Removal of restricting virtual devices,
- A smooth initiation and monitoring of the migration,
- And finally, the verification of a successful transfer.
Though the current environment is a loose collection of VMs and LXCs, every successful skill learned and used paves the way for a more advanced setups. Embrace these foundational experiences as you continue to optimize your homelab.
Share your own beginner skills, experiences, or ask questions in the comments below!